Timber Floor Sanding
If you are considering getting your floors sanded then it is important to achieve a first class finish. If your old wooden floor is expertly restored it could actually increase the value of your property.
Step 1 : Floor Preparation
Nails can severely damage the sanding machines so all nails in the floor are punched down. Any tacks or small nails left from carpet tack strips or vinyl edging need to be removed to reduce the possibility of damage. Some adhesives which have been used to secure vinyl flooring may need to be removed as they can clog the sandpaper and running gear of the sanding machines.
Step 2 : First Floor Sand
The first floor sand is done with coarse grit papers to remove old paint and stains and to make the floor flat. This also removes any differences in height between the floor boards. The most common sand paper used first is a 36 or 40 grit. Any areas which cannot be reached by the belt sanders are sanded using an edge sander and hand tools.
Step 3 : Filling
Nail holes are filled with a tinted putty and larger faults are filled at the floor sanders discretion with a tinted 2 pack filler.
Step 4 : Second Floor Sand
The Second Floor sand is done using finer 80 -150 grit sand papers depending upon the floor type. This time the belt sander is used inline with the grain of the timber so that any sanding marks align with the timber grain. The second floor sand also removes any excess filler.
Step 5 : Third Floor Sand
The third and final sand, also known as the buff sand completes the sanding process prior to the application of the coatings
Step 6 : Coating
The floor is vacuumed clean before being coated with the desired product. 3 coats are applied over 3 days with a very light sand between coats.
Call Traditional Floor Sanding today and discover how we can transform an unsightly floor into a beautiful wooden floor.
|
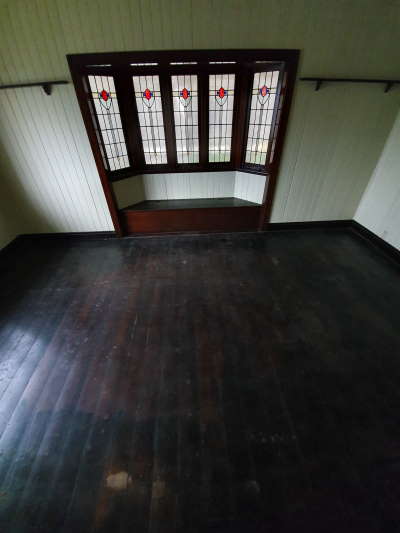
Traditional Timber Floor - Before Sanding |
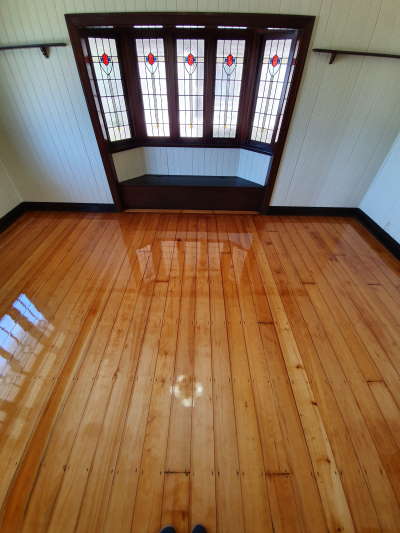
After Sanding and Coating Applied |


